

Tour du Mont Blanc Guide
In late summer 2019, Kyle and I went on the trip of a lifetime: the Tour du Mont Blanc! This high alpine trail is a 110-mile loop around Western Europe’s highest peak. One of the reasons I wanted to go (besides the spectacular scenery) is that it is open to everyone: no permits. If you know anything about trying to secure backcountry permits for popular hikes in the US—John Muir Trail, Wonderland Trail, Pacific Crest Trail—it can be a big lottery with slim chances of winning a coveted permit. But you can waltz right up to the Mont Blanc trailhead and begin your hike when you want.
This post is especially meant for those who plan to camp for some or all of the trail. It will go through the basics of our trip, plus everything I wish I knew when planning it. Overall we had an excellent time, but there are a few things I would change if I were to do it again—and I absolutely would love to hike it again!

The “start” in Les Houches. The trail itself starts as you walk out of town.
Our Plan
Start in Les Houches and go anti-clockwise, which is the direction most people go. I don’t think there is a major difference in direction, as both have steep ups and downs. You might hike with fewer people if you go clockwise. We decided anti-clockwise because we wanted to save the best views for last (weather prevented this though).
We planned to bring our tent and camp as much as possible. We didn’t bring a stove but intended to eat dinners at refuges and stock up on groceries in town. We scheduled a rest day in Courmayeur for day 4, and we left two days for wiggle room in case we were delayed at any point or wanted to stay in one area longer. This plan worked out for the most part!
One of the challenges of the TMB is booking all the refuges in advance or along the way. It can be such a hassle that the vacancies of the mountain huts can actually dictate when you start your trip. Most of the huts only take reservations by phone, which can be a language barrier for some. We knew we didn’t want anything to do with that puzzle—we were here for the outdoors after all, and didn’t want to spend the whole time packed like sardines with other smelly hikers. So, we opted to bring a tent. Kyle and I have quite a bit of backcountry experience between the two of us, so we felt confident in a tent. Plus, the tent means you can go at your own pace, save money, camp anywhere that is legal, and have more peace and quiet.
We did not plan our itinerary day by day as far as where we would camp each night. Instead, I marked in the Cicerone guidebook every place where we could camp, then played it by ear. If we came to the first campground early in the day or with a lot of energy left, then we went to the next one. This seemed to work well enough for us!

The view from the Col de Voza on day one.

The view from the approach to the Col de Tricot on day one.
Getting There
We flew into Paris, then took a train to Geneva, then a shuttle to Chamonix where we rested up in a hotel before taking the tram the next morning to the trailhead in Les Houches. It was such a long travel day, so I recommend instead getting your flight to Geneva if you can. Typically a flight to Geneva is more expensive, but keep in mind you’re not paying the Paris-Geneva train fare. Plus, it will cut off a lot of travel time and stress.
From Geneva, there are several shuttle companies like SwissTours, FlixBus, and ChamExpress that will take you to your hotel in Les Houches or Chamonix. We wanted to stay in the larger town of Chamonix to stock up on supplies. Alternatively we could have stayed in hotels in Les Houches, but there weren’t as many options, and it is a bit sleepier.
Plus, the Ultra Tour du Mont Blanc was in Chamonix! The town was all abuzz with excitement and festivities, and we watched runners jogging through the streets in preparation for their start times in the next few days. (There are several different race lengths, womens/mens, etc. so races start on different days.) Originally we worried we made a huge mistake by hiking at the same time as the marathon, but I think it enriched our trip. For the first two days we shared the trail with runners, and we were always courteous and gave way to them. We probably payed higher hotel prices due to the event, but if you book super in advance you might not.
The next morning, we headed to the Chamonix-Aiguille-Midi rail stop with free fares from our hotel. I think most hotels in town will give you these, so be sure to ask. When we were waiting for the train (which is tiny and more like a tram), there were several other backpackers and we assumed we could just follow them. Surely the only hike around here is the TMB? Wrong. We learned these hikers were on the Haute Route, and they were going in the opposite direction as us. So don’t just follow other hikers. Know where you’re going. From Chamonix, you’ll head West for Les Houches.

View of the Mont Blanc massif from central Chamonix.
The Trailhead
There are actually several places to start the trail because it passes through many towns, but most people start in Les Houches. From the Les Houches train depot, you can walk across the river and highway to town. From town, you can either take the Bellevue Cablecar up to the Bellevue Plateau, which is basically where the serious hiking and views begin, or you can walk up a very steep hillside to get there.
If you don’t want to take the cablecar and prefer to hike up the ski slope, which is what we did, it’s a little tough to find the trailhead in the town of Les Houches. Our guide (and all the blog posts I could find) are pretty vague and just say the trail starts in Les Houches. Well, I can tell you the exact address to enter into Google Maps: 445 Route de Bellevue. There, you’ll find your first route marker with “TMB” on it, pointing you up some grassy steps.
We really wish this address was posted somewhere because all we had to go on was the kind cashier at the cablecar who just said “continue that way” and we’ll get to it. I think the reason this was hard to find is because not many people go this route. It is really steep, much of it actually on paved roads through residential areas, and probably not what you were expecting for the hike. Not many views, and not even a trail really. The only reason we did it versus taking the cablecar like everyone else is because we’re purists (I guess) and wanted to start from ground level. Would I recommend it? It depends. We are pretty young and fit, but it was still a quite extreme way to start if your body isn’t ready for it. You should also ask yourself if it matters to you to walk every part of the trail. I can tell you without shame that we skipped some parts elsewhere (more on that below).

Approaching the Auberge du Truc on day one. We didn’t stop in, but it looked nice.

More elevation gain on day two.

Col du Bonhomme on day two.

High views on day two.
Camping on the TMB
We camped in our tent most nights. We usually found holiday parks or even just the field or yard next to a refuge to pitch our tent. I found holiday parks pretty affordable, and they often had decent facilities like flush toilets, showers, and even fully operating kitchens.
There were pros and cons to camping on the TMB. Pros: we went at our own pace, didn’t have to hassle with refuge bookings, saved money, and got more time to ourselves rather than sleeping in a room with dozens of people. Cons: the TMB doesn’t technically allow you to wild camp in many places. Actually for the whole stretch of Italy, we weren’t allowed to at all and had to stay one night in a refuge.
We went into the trip believing we could easily find a camping spot out of sight, no big deal. What we didn’t realize is that the trail is extremely exposed, so not many places were out of sight of the trail or of the tiny towns all around. Is it likely that a resident of these towns will call the police and report you if they see your tent? Probably not. Do you want to risk hundreds of dollars in fines? For us, no. So we ended up staying in these car-camping holiday parks more often than we thought, and that was a bit of a letdown. But if you are bold (and maybe have a camouflage green tent) you might be able to get away with it. We did see a few people camping illegally, but there aren’t any rangers patrolling the trail like in the US.
Even though I do not regret camping for most of the time, Kyle had a different take—he would have preferred to spend every night in a refuge because they are a unique feature of the TMB, so why not take advantage of that and get the whole experience? The trail is not pristine wilderness like backcountry places in the US where you can pitch a tent anywhere you like. Instead, every day you’re coming through some form of civilization, whether a single mountain hut, a small hamlet, or a full town. So you’ll be camping near civilization, which isn’t usually what you want on a backpacking trip. I see his point, but I knew I ultimately wanted the solitude and quietness of a tent rather than sleeping in bunkbeds. It’s kind of trading one discomfort for another, so you’ll have to weigh these trade-offs for yourself. Keep in mind that the refuges were around $80 a night per person(!) so that’s another trade-off.
Where we camped:
· Camping Le Pontet (Les Contamines)
· Refuge des Mottets (separate, in the hills above; ate dinner at refuge)
· Camping Les Rocailles (Champex)
· Camping Le Peuty (large campground run by refuge that serves delicious meals)
· Auberge La Boerne (in small yard outside refuge that also serves meals)

Day two on the Col des Fors, one of the highest points of the TMB.

Sunset at Refuge des Mottets before a storm on night two.
Other Accommodation
We spent a rest day in Courmayeur, where many people do. If you haven’t been on a thru-hike longer than a week before, then you will probably benefit from a rest day here. The town is the second largest on the TMB after Chamonix, so there’s plenty to do to fill a day. We were there on a Sunday and were worried everything would be closed, but it was actually the opposite: it was market day! The whole town was alive with shoppers, live music, dancing, etc. and we couldn’t have been luckier.
Because we were camping most of the time, we had some extra money to splurge on two nights at the Gran Baita Hotel and Wellness. It was so worth it! The pool and spa were gorgeous, and we loved lounging in plush robes on the grassy grounds. I definitely recommend this hotel if you want to treat yourself. It is a little out of the heart of town, but still within walking distance of everything. Plus, there’s a nice restaurant onsite, but I don’t think we had nice enough clothes for it, so we stayed away. I also want to shout out the kind staff who helped us call Rifugio Bonatti ahead of time and secured us a reservation! Excellent service.
We needed to spend one night in a refuge along the Italian stretch because wild camping isn’t allowed, and the designated campgrounds were a very long detour into a valley (which we’d have to climb out of again). We stayed at Rifugio Bonatti, which was FANTASTIC. It is perfectly situated across the valley from Mont Blanc, and we were treated to a glorious view of sunrise on the peak. The accommodations were pretty clean and orderly, and the food was not bad. We mingled with some fun people and overall left the next morning wondering to ourselves if we’d been missing out this whole time. But I can’t imagine all the refuges being that nice. From some other blog posts I’ve read, Rifugio Bonatti is actually one of the nicer ones. It is named after a famous Italian mountain climber, and it seemed like the family that runs it really took pride in that.
While we didn’t stay in any other refuges, we stopped for coffee and lunch at a few more. The ones I recommend for friendly service, views, and food are: Nant Borrant, Elisabetta, Cabane du Combal, and Elena.
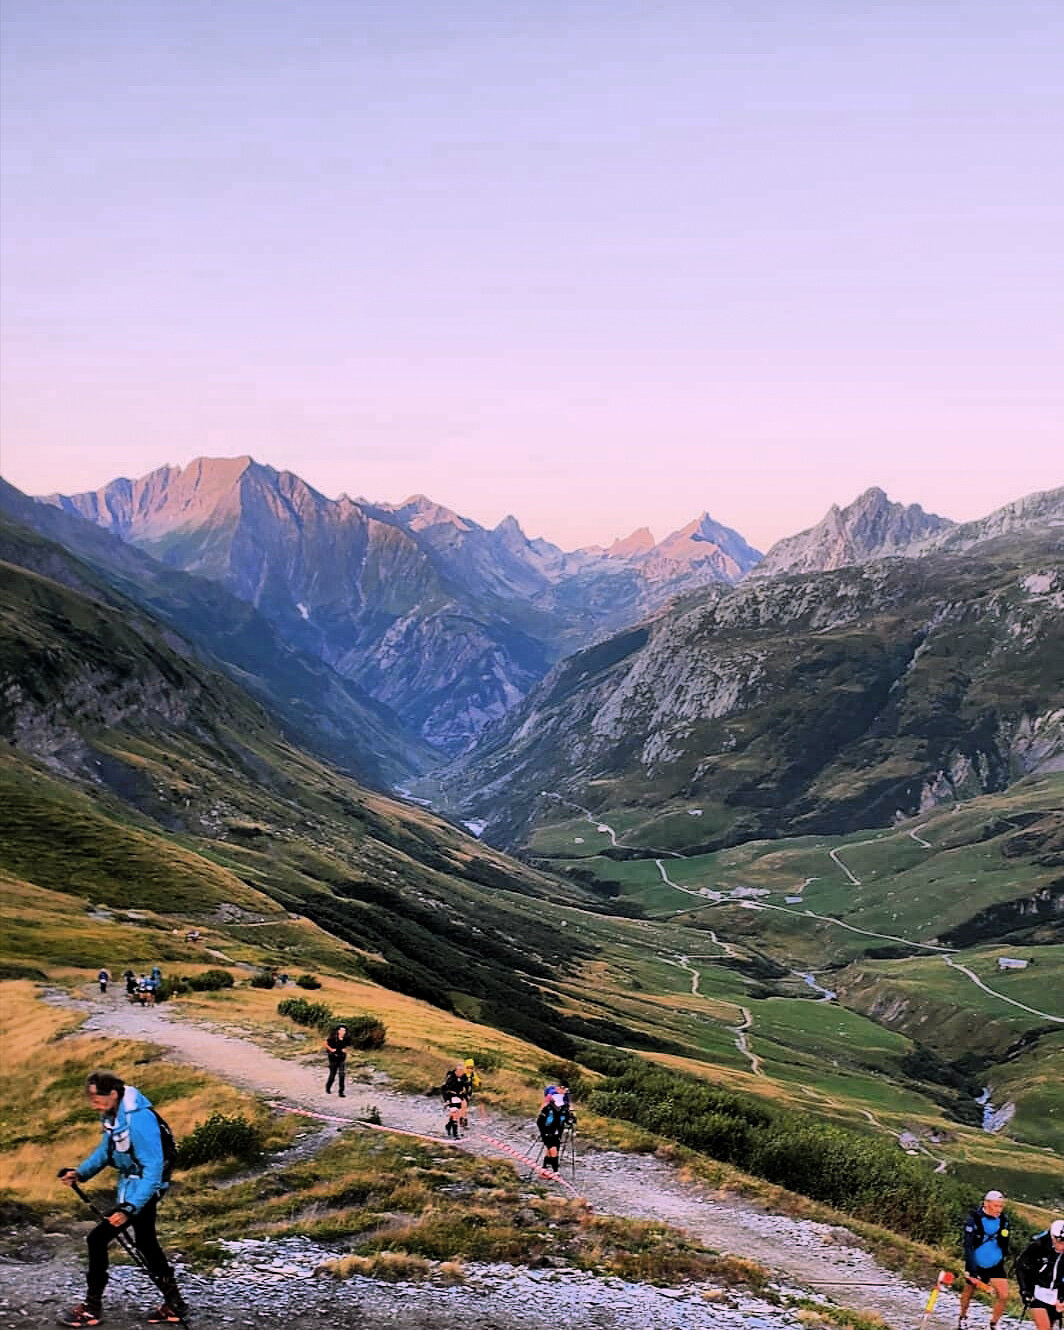
Sunrise on day three with ultrarunners approaching the Col de la Seigne. In the middle of the night we awoke to their headlamps flickering past our tent. When we packed up camp around 6 am, there was still a steady stream of runners.

Easy valley stroll at Lac Combal on day three.
Meals
For meals, we would stop in at the refuges for dinner, which do serve hikers even if you aren’t staying there. This more or less worked for us, but one thing we didn’t realize is that these refuges DO NOT function like restaurants where you can walk in anytime and order whatever you want. Instead, they have a set dinnertime when all guests sit down and are served one kind of meal, just like a mess hall at camp. Ideally you let them know in advance that you’ll be joining for dinner, but most of the time they were able to accommodate us last minute. They were even able to accommodate my vegetarian requests (though don’t expect much; these are remote mountain huts after all). Just be aware of their operating times; don’t expect to roll in at 5 pm thinking you can get an early dinner then hike a few more miles to a secluded campsite. You’ll be waiting around until 7 pm for dinner to be served.
Apart from these refuges, there were some larger towns here and there that would have a grocery store for stocking up on no-cook breakfasts, lunches, and snacks. Some refuges also have sack lunches for hikers just passing through during the day, but in our experience they weren’t much to speak of. I recommend shopping for all your own lunches/snacks.
There is no need to bring a water filter. Every day you will pass multiple opportunities to fill up at refuges, towns, or water spouts with clean water.
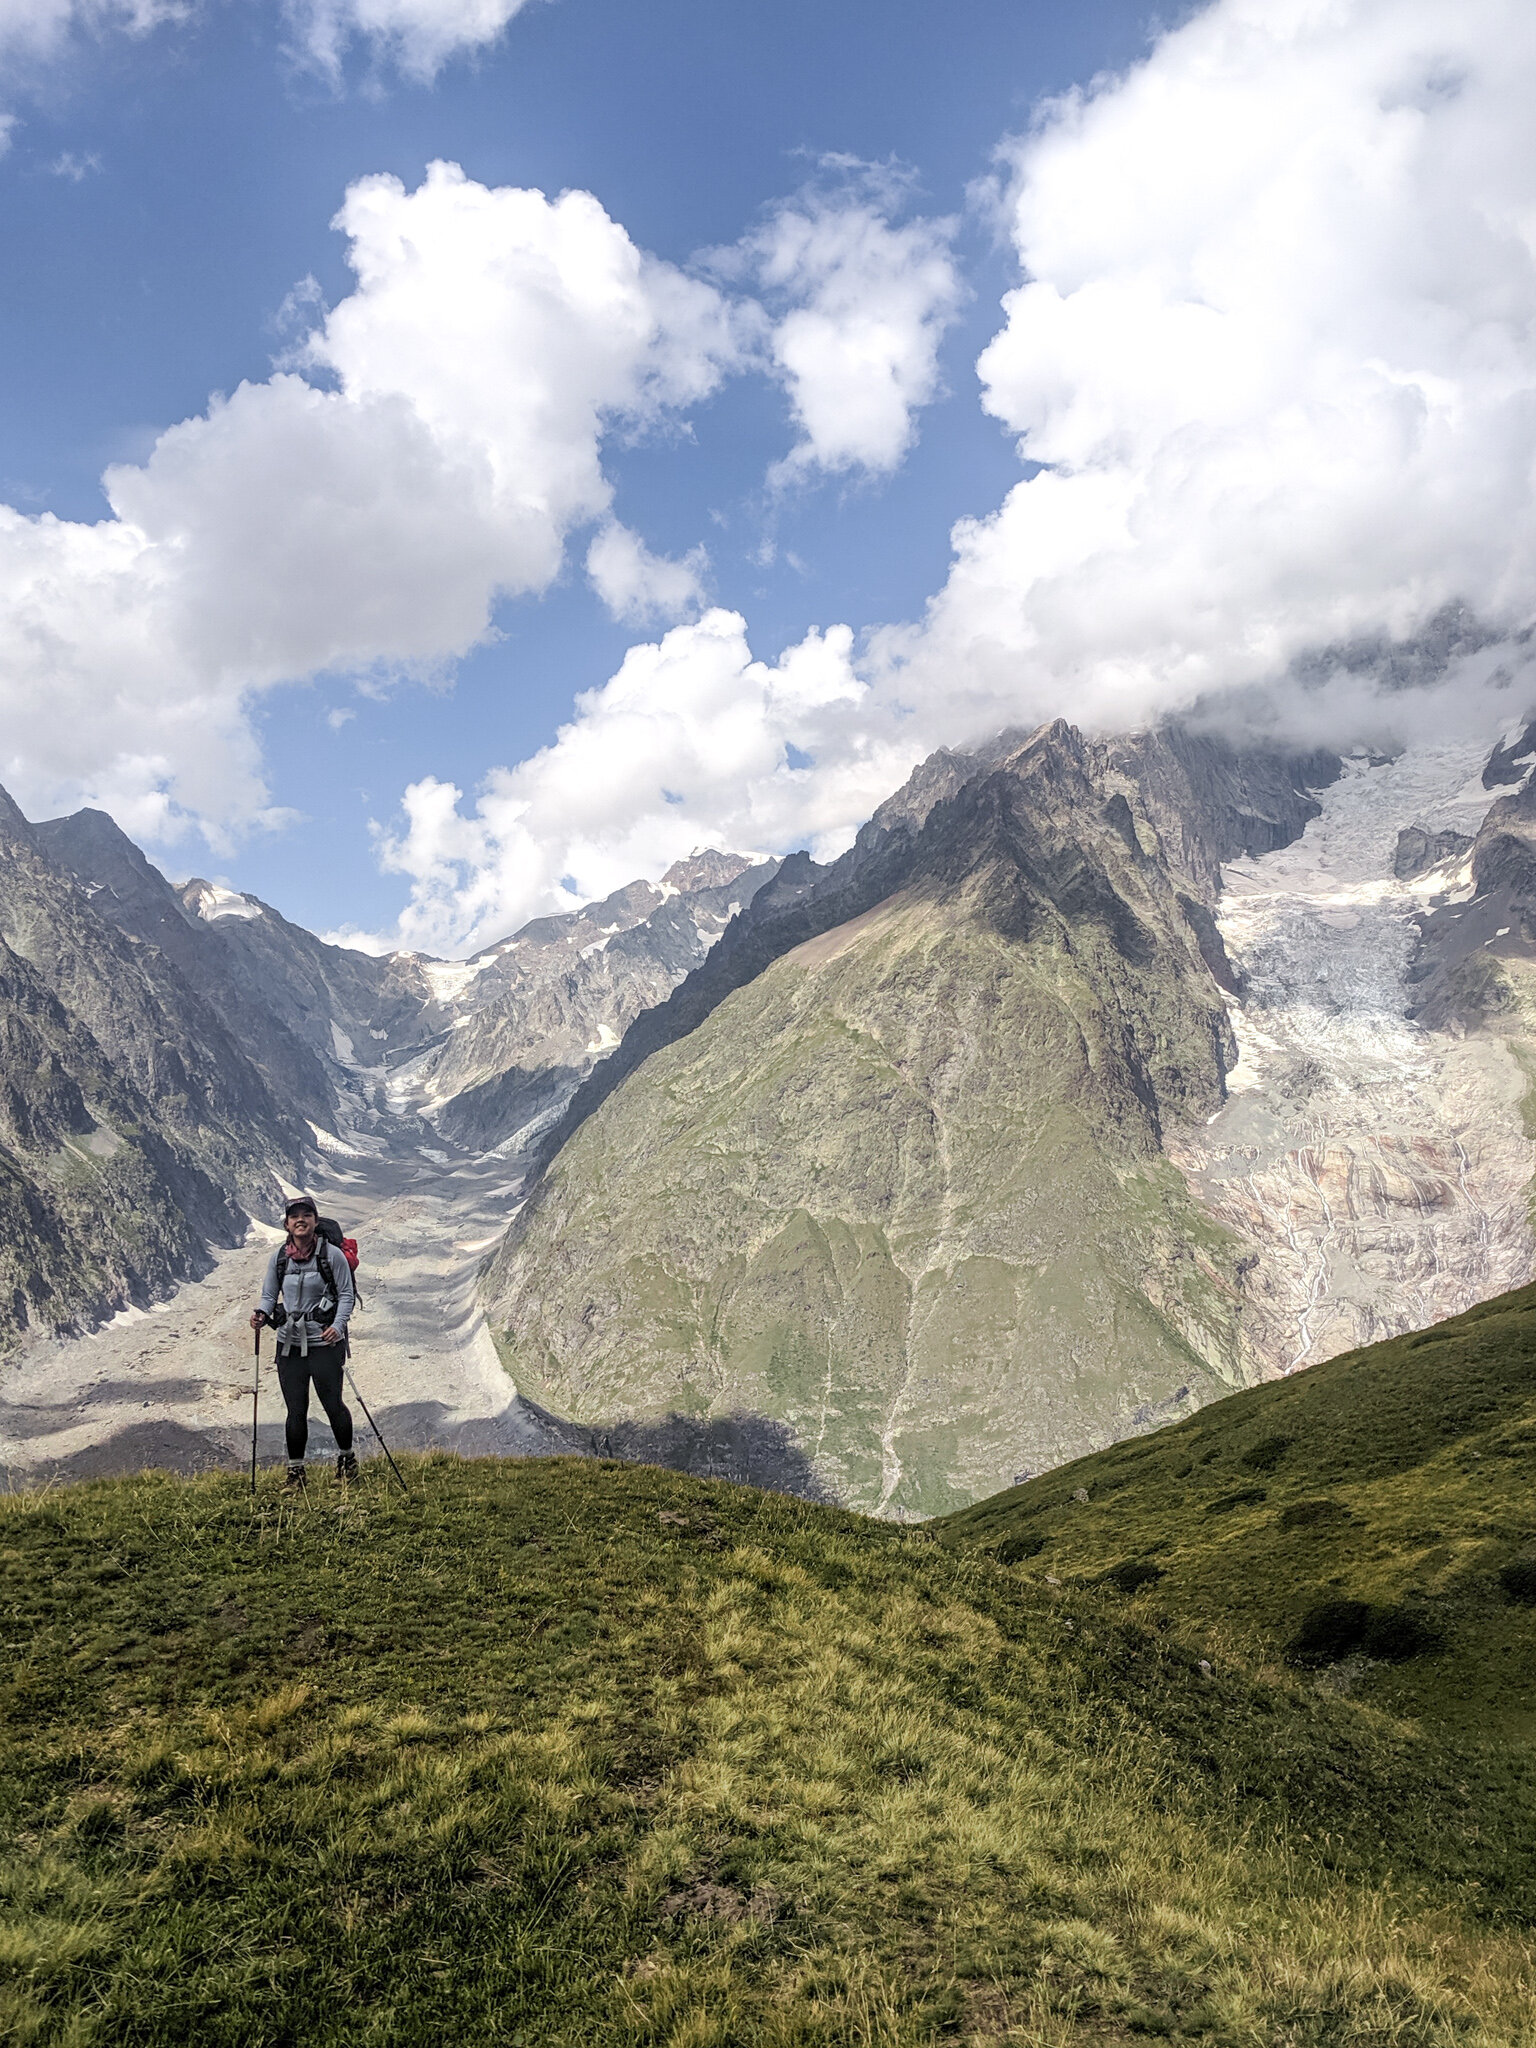
High route views between Lac Combal and Courmayeur on day three.

High route views between Courmayeur and Rifugio Bonatti on day five.
Alternate Routes
We took the high route almost every time. On most stages, there is a low route for bad weather or if you just want an easier trail, and a high route that should only be attempted in fair weather. The high route took us over these mountain passes: Col de Tricot, Col des Fors, Col Sapin, Fenetre d’Arpette, and Lac Blanc (refer to the Cicerone guidebook for these). These were definitely tough, but so worth it! If you are fit and get good weather, I say go for it. A note of caution for the Fentre d’Arpette: the last push to the summit was boulder scrambling, and it might have been tough to find our way had there not been other hikers. Otherwise, the whole trail was relatively smooth with painted markers or signs.
Confession: we took a ski lift down to valleys not once but twice: first going into Courmayeur and second into Chamonix at the end. Both were just extremely steep downhills below treeline, so no views. I don’t regret doing it; my knees definitely would have been wrecked even with trekking poles. Our goal was to enjoy the trip as much as we could, not hike every bit of trail. There’s no medal at the end. As we went down on the ski lift, we could see the trail we could have been on and were so glad there was nothing forcing us to hike that.
Training
This trail is NO JOKE. The grade is extremely steep at times, and the Ultra Tour du Mont Blanc is one of the toughest ultramarathons in the world. There is no easing in—you are immediately smacked with some tough elevation gains. This trail is especially hard because many of the climbs are not switchbacks. They are often straight up a hillside, which can be really tough on your calves. So when preparing for this hike, it was basically leg day every day. Stairmaster, calf raises, lunges, squats. I also did a lot of balancing exercises to strengthen my knees because I (correctly) anticipated the downhills to actually be tougher on my body.
If you don’t have much backpacking experience, then you’ll also want to go on a few training hikes with a loaded pack. Really get used to your pack; DO NOT bring a brand-new pack unless you want blisters on your hips.
I like to think I keep a relatively healthy fitness level all the time, but I especially kicked it up in the 3 months leading up to it with extra cardio and weightlifting targeting my legs and back. Remember that the more fit you are, the more you’re going to enjoy this hike.

View of Mont Blanc from the Col de Balme on day eight.

View of the Mer de Glace on day eight.
Budget
Not including the flight and train, I think our overall spending on the trail came to about $800 per person. This includes shuttle transfers, hotels in town, campground fees, and food/dining. This is an estimation since we didn’t track spending too much. As I mentioned, we saved a lot by camping. However, food was pretty expensive, especially at restaurants, so keep that in mind. But we definitely didn’t hold back on the food, so I think a more budget-conscious person could easily bring that cost down by only shopping at grocery stores. Courmayeur and Chamonix also have campgrounds in town, so you could save more there too versus booking hotels.
Itinerary
Day 1 – Les Houches to Les Contamines via Col de Tricot high route
Day 2 – Les Contamines to Refuge des Mottets via Col des Fors high route
Day 3 – Refuge des Mottets to Courmayeur
Day 4 – Rest day in Courmayeur
Day 5 – Courmayeur to Rifugio Bonatti via Col Sapin high route
Day 6 – Rifugio Bonatti to Champex
Day 7 – Champex to Le Peuty via Fenetre d’Arpette high route
Day 8 – Le Peuty to Auberge La Boerne
Day 9 – Auberge La Boerne to Les Houches via Plan Praz gondola to Chamonix, then valley walk to Les Houches

Misty weather above Lac Blanc on day nine.

Mountaintops over Lac Blanc on day nine. Really wish we had clear weather here!

More misty views on day nine.
Our day 9 had horrible weather; it had rained the previous night, and the day dawned misty and cold. I was so disappointed because our guidebook said this stretch had the best views of Mont Blanc. We decided to get below cloud level and take the gondola down to Chamonix, then walk along the river to our starting point in Les Houches.

Lac des Gaillands between Chamonix and Les Houches on day nine.

Done with the hike and changed into my socks and sandals as soon as I could!
We then had two full days in Chamonix before we had to catch our train back to Paris. This would have been wonderful if the weather were clear, because we could have seen the Mer de Glace or taken the Aiguille du Midi cable car that takes you almost to the summit of Mont Blanc for some killer views. But with the mist, we found ourselves just reading in cafes or window shopping in the rain.
In retrospect, we could have spread our hiking days out to use that extra time and go at a slower pace. I don’t know why we rushed! Our guidebook recommended 11 days, and we did it in 8 without the rest day. Some of those days where we combined 2 stages were pretty painful, and we didn’t have to do that. So if you have the time, I recommend 10 or the full 11 days. Just because we were fit and could take on that extra mileage per day, it didn’t make it more enjoyable. If I could go back and do it again, the number one thing I’d change is to not rush!

Post-hike stroll around Chamonix.

A chapel in Chamonix.
Phew! I think I covered everything, but if there’s something I missed, just reach out to me on Instagram @joannexplores and I’d be happy to answer any questions!


